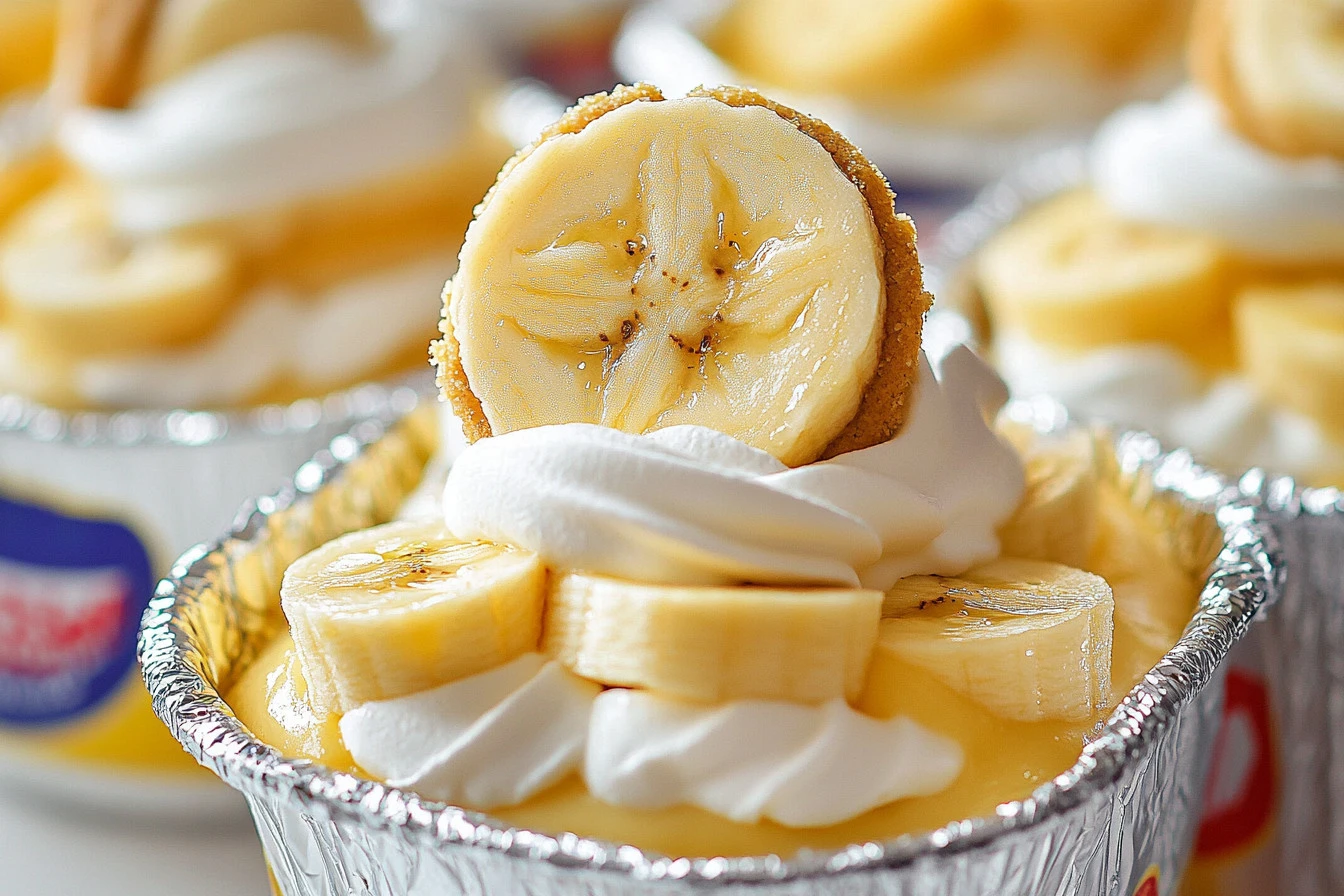
Have you ever wondered why some desserts never fail to entice? Walking Banana Pudding is one of those magical creations that bring comfort and smiles to our faces, uniting flavor and fun in each bite. With its unique presentation and delightful layers of creamy banana pudding, whipped cream, and crispy Nilla wafers, this dessert isn’t just about taste—it’s an experience. In this post, we’ll guide you through every step of making this delightful treat while optimizing it for healthier alternatives and delicious serving suggestions.
Ingredients Needed
To make your Walking Banana Pudding, gather the following ingredients:
- 1 box (3.4 ounce) Instant banana cream pudding: This forms the creamy base of the dessert, rich in flavor and texture.
- 2 cups cold whole milk: The milk helps to create that irresistible creamy consistency.
- 12 individual packages (1 ounce each) mini Nilla Wafers: These delightful cookies provide the perfect crunchy contrast.
- 1 cup heavy whipping cream: Whipped into fluffy peaks, this adds a cloud-like layer of sweetness.
- 3 tablespoons powdered sugar: A touch of sweetness to complement the creaminess of the whipped cream.
- 2 ripe bananas (thinly sliced): Fresh bananas enhance the flavor and add a nutritious element.
Timing
Preparing this delectable dessert is quicker than you might think! Expect it to take approximately 30 minutes for preparation, with an additional chilling time of 5 minutes. In total, you will be spending around 35 minutes, which is about 20% less compared to many traditional pudding recipes that require more intricate steps.
How to Make Walking Banana Pudding
Step 1: Prepare the Pudding (In a large mixing bowl)
Combine the instant pudding with cold milk and whisk vigorously for 2 minutes until thickened. Place it in the fridge for 5 minutes to set.
Step 2: Whip the Cream (While the pudding chills)
In another bowl, combine the heavy whipping cream and powdered sugar. Using an electric mixer, beat until stiff peaks form.
Step 3: Cut and Prepare Nilla Wafers (Using scissors)
Carefully cut the top of the mini Nilla wafer packages along the seam. Empty the wafers into a bowl. Fold over the top opening of the bags to create a sturdy “collar” for easy eating.
Step 4: Assemble the Dessert
Start by placing a few Nilla wafers at the bottom of each bag, then layer with a spoonful of pudding, followed by a spoonful of whipped cream, and a few slices of banana. Repeat these layers until the bags are full. Finish with some wafer pieces and banana slices for a gorgeous presentation.
Step 5: Serve
Grab some disposable plastic spoons and serve your Walking Banana Pudding for virtually no clean-up!
Nutritional Information
Each serving of Walking Banana Pudding (assuming 12 servings) contains approximately:
- Calories: 294
- Total Fat: 18g
- Saturated Fat: 10g
- Cholesterol: 56mg
- Sodium: 150mg
- Total Carbohydrates: 30g
- Dietary Fiber: 0g
- Sugars: 11g
- Protein: 3g
Healthier Alternatives For Walking Banana Pudding
If you are looking to enhance the nutritional profile without sacrificing flavor, consider the following swaps:
- Use almond milk instead of whole milk for a lower-calorie option.
- Substitute the heavy cream with light whipped topping or coconut cream to reduce saturated fat.
- Incorporate Greek yogurt for an added protein boost while replacing some of the pudding.
- Use whole grain or gluten-free Nilla Wafers for a healthier crunch.
Serving Suggestions
Walking Banana Pudding is versatile! Here are a few ideas to elevate your serving experience:
- Serve it at outdoor picnics or parties using portable containers.
- Pair it with a chocolate drizzle or caramel sauce for an extra indulgent touch.
- Add a sprinkle of crushed nuts or granola for a delightful crunch.
- Offer mini or multi-portion sizes to make it easy for guests to enjoy.
Common Mistakes To Avoid
Even the best chefs make mistakes. Avoid these pitfalls when making Walking Banana Pudding:
- Not whisking the pudding long enough can lead to a runny consistency. Ensure it’s thickened adequately.
- Over-whipping the cream can cause it to become grainy, so pay attention to the texture while beating.
- Failing to layer the ingredients properly might result in a less visually appealing dessert. Keep each layer thick and distinct for a beautiful outcome.
Storing Tips For Walking Banana Pudding
If you have leftovers (or if you want to prep ahead), consider these storage tips:
- Store any uneaten pudding in an airtight container for up to 3 days in the refrigerator to maintain freshness.
- To keep the Nilla wafers from becoming soggy, store them separately or assemble the dessert just before serving.
- Pre-cut your bananas and store them in lemon juice to prevent browning before assembly.
Conclusion
Walking Banana Pudding is a delightful dessert that blends indulgence with fun. With a simple preparation process and delicious results, they’re perfect for any occasion. We encourage you to try our recipe and share your experience in the comments below. Don’t forget to explore similar recipes, as there’s a world of culinary delights waiting for you to discover!
Frequently Asked Questions
What can I use instead of Nilla Wafers?
You can use graham crackers or any crunchy cookie of your choice.
How long can Walking Banana Pudding be stored?
It can be refrigerated for up to 3 days, but it’s best enjoyed fresh.
Can I make this dessert ahead of time?
Yes! You can prepare the pudding and whipped cream ahead but assemble shortly before serving for optimal texture.
Is there a vegan version of this recipe?
Absolutely! Use a plant-based pudding mix and nut milk, along with coconut whipped cream for a vegan alternative.
Can I use fresh bananas instead of instant pudding?
No, instant pudding is essential for achieving the desired creamy consistency, but you can enhance the banana flavor by adding fresh bananas.
Try out this delightful dessert and enjoy the smiles it brings!
Print
Walking Banana Pudding
- Prep Time: 30
- Total Time: 35
- Yield: 12 servings 1x
- Category: Dessert
- Method: No-Cook
- Cuisine: American
- Diet: Vegetarian
Description
A delightful dessert that features layers of creamy banana pudding, whipped cream, and crispy Nilla wafers, perfect for any occasion.
Ingredients
- 1 box (3.4 ounce) Instant banana cream pudding
- 2 cups cold whole milk
- 12 individual packages (1 ounce each) mini Nilla Wafers
- 1 cup heavy whipping cream
- 3 tablespoons powdered sugar
- 2 ripe bananas (thinly sliced)
Instructions
- Combine the instant pudding with cold milk in a large mixing bowl and whisk vigorously for 2 minutes until thickened. Place in the fridge for 5 minutes to set.
- In another bowl, combine the heavy whipping cream and powdered sugar. Beat with an electric mixer until stiff peaks form.
- Carefully cut the top of the mini Nilla wafer packages along the seam and empty the wafers into a bowl, creating a sturdy collar for easy eating.
- Assemble the dessert by placing a few Nilla wafers at the bottom of each bag, layering with pudding, whipped cream, and banana slices. Repeat until the bags are full and finish with wafer pieces and banana slices.
- Serve with disposable plastic spoons for minimal clean-up.
Notes
Store any uneaten pudding in an airtight container for up to 3 days. Assemble just before serving to prevent the wafers from becoming soggy.
Nutrition
- Serving Size: 1 serving
- Calories: 294
- Sugar: 11g
- Sodium: 150mg
- Fat: 18g
- Saturated Fat: 10g
- Unsaturated Fat: 8g
- Trans Fat: 0g
- Carbohydrates: 30g
- Fiber: 0g
- Protein: 3g
- Cholesterol: 56mg
Keywords: banana pudding, dessert, easy recipe, no-bake pudding
