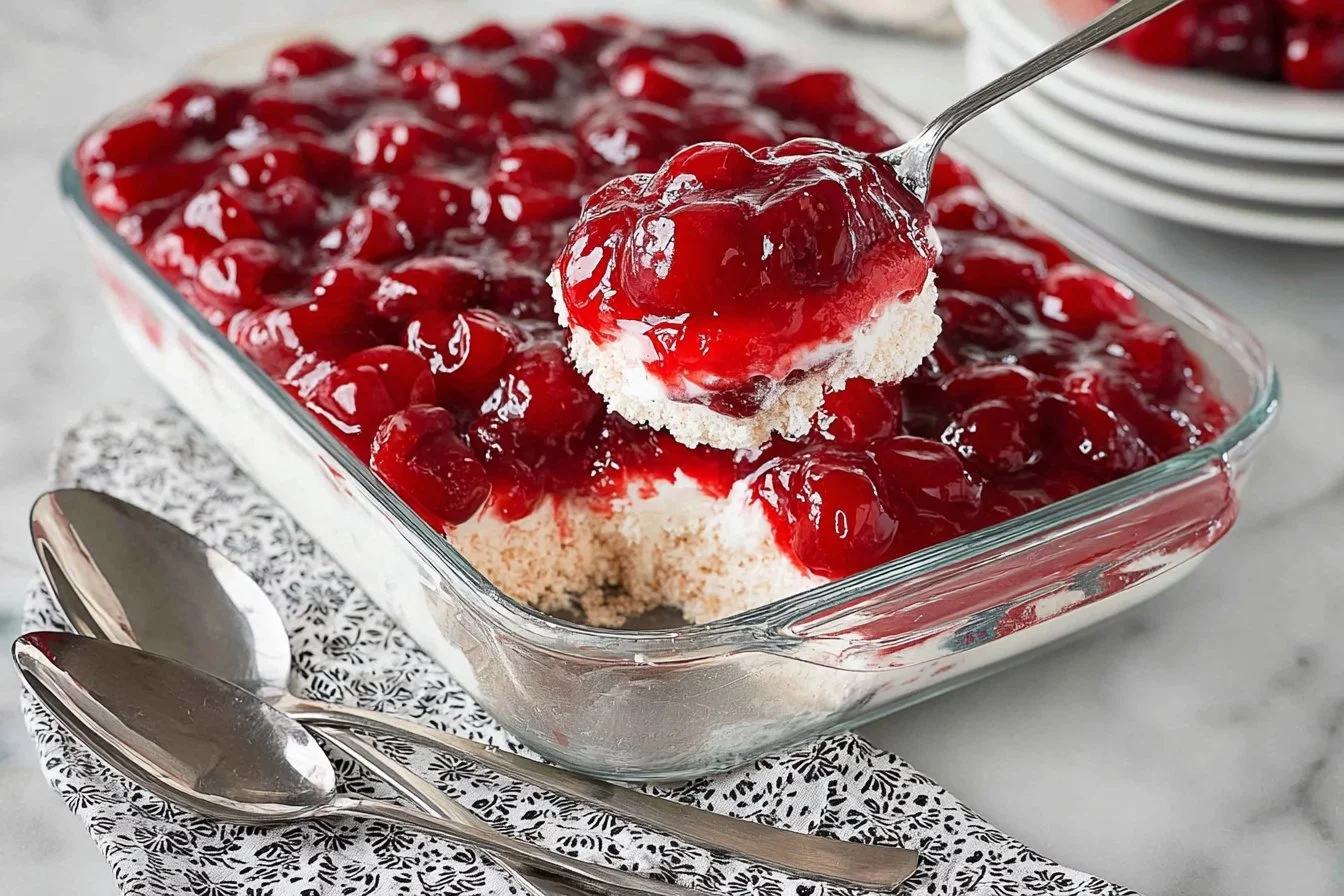
Have you ever wondered how a simple combination of cream cheese and cherry pie filling can create a dessert that feels like a winter wonderland? Cherries in the Snow is not only a delightful dish that tantalizes your taste buds but also serves as a nostalgic nod to seasonal flavors. If you’re looking for a sweet way to embrace winter, this recipe offers delicious satisfaction made with minimal effort.
Ingredients Needed
To create your own Cherries in the Snow masterpiece, gather the following ingredients:
- 12 ounces block style cream cheese (room temperature): Cream cheese adds a rich, velvety texture to the dessert. Opt for full-fat for the best flavor.
- ¾ cup powdered sugar (sifted): This sweetener melts seamlessly into the creamy mix, ensuring smooth consistency.
- ⅓ cup whole milk: Adds the necessary moisture and helps create a fluffy mixture. You can substitute with almond milk for a dairy-free option.
- ½ teaspoon vanilla extract: Brings a warm, aromatic flavor that enhances the overall taste.
- 8 ounces frozen whipped topping (thawed, Cool Whip brand used): This lightens the creamy mixture, making it airy. If desired, you could use homemade whipped cream for a fresher taste.
- 1 pre-baked angel food cake (torn into ¾-1 inch pieces): This sponge-like cake provides a light and fluffy base for the dessert. A store-bought variety saves time without compromising quality.
- 42 ounces (2 – 21 ounce) cans cherry pie filling (Comstock brand used): The stars of the dish, cherries add both color and a burst of flavor. You could swap for homemade cherry filling for a more personalized touch.
Timing
Preparing Cherries in the Snow is surprisingly quick and easy! Here’s a breakdown of the timing involved:
- Preparation Time: 20 minutes
- Refrigeration Time: 30 minutes to 2 hours
- Total Time: 90 minutes roughly, which is 20% less than the average dessert requiring a cooling period.
How to Make Cherries in the Snow
Step 1: Beat the Cream Cheese
Using an electric mixer, beat the cream cheese in a large bowl at medium-high speed for 1-2 minutes until light and fluffy, ensuring no lumps remain. This will give your dessert a creamy base.
Step 2: Add the Sweetness
Mix in the sifted powdered sugar and continue beating until fully incorporated. This adds the necessary sweetness without being overpowering.
Step 3: Incorporate Milk and Vanilla
Pour in the whole milk and vanilla extract. Keep beating on medium speed until the mixture is smooth and fluffy. Scrape the sides and bottom of the bowl to ensure everything is well-blended.
Step 4: Fold in the Whipped Topping
Gently fold the thawed whipped topping into the cream cheese mixture until no white streak remains. This step is crucial to achieving that light, airy texture.
Step 5: Add the Angel Food Cake
Carefully fold the torn pieces of angel food cake into the cream cheese mixture, being cautious not to break it up too much. This incorporates the cake without making it mushy.
Step 6: Assemble the Dessert
Transfer your cream cheese mixture into a 9×13 baking dish and spread it into an even layer. Spoon cherry pie filling evenly over the top.
Step 7: Refrigerate
Refrigerate for a minimum of 30 minutes, or up to 2 hours, allowing flavors to meld and the cream cheese layer to set before scooping and serving.
Nutritional Information
This crowd-pleaser serves roughly 12 portions. Each serving contains approximately:
- Calories: 250
- Total Fat: 12g
- Saturated Fat: 6g
- Cholesterol: 30mg
- Sodium: 250mg
- Carbohydrates: 35g
- Dietary Fiber: 1g
- Sugars: 20g
- Protein: 3g
These values make it a delightful treat, but it’s always good to enjoy desserts in moderation!
Healthier Alternatives For Cherries in the Snow
Looking to lighten up this dessert? Consider these modifications:
- Low-Fat Cream Cheese: Use low-fat cream cheese instead of regular to reduce fat content.
- Alternative Sweeteners: Substitute powdered sugar with a sugar alternative like erythritol, especially beneficial for those watching sugar intake.
- Reduced Sugar Cherry Filling: Opt for a reduced-sugar cherry filling for a healthier fruit topping.
- Homemade Whipped Cream: Instead of Cool Whip, whip your own cream using heavy whipping cream, controlling the amount of sugar added.
Serving Suggestions
Cherries in the Snow can be served in various creative ways:
- Individual Portions: Scoop the dessert into clear cups for an appealing presentation at parties.
- Topped with Nuts: Sprinkle with chopped walnuts or almonds for a crunchy contrast.
- Fresh Fruit Garnish: Add fresh cherries or sliced strawberries to enhance the visual appeal and freshness.
Common Mistakes To Avoid
- Not Allowing Time to Chill: Skipping the refrigeration time can yield a runny mixture. Patience is key!
- Overmixing Cream Cheese: Beat just enough to achieve fluffiness; overmixing can lead to a dense texture.
- Skipping Ingredient Quality: Using low-quality cherry filling or cream cheese can affect the dessert’s overall flavor profile.
Storing Tips For Cherries in the Snow
Store leftovers in an airtight container in the refrigerator. Cherries in the Snow can be kept for about 3 days. If you plan on making it ahead of time, prepare the layers separately and assemble them on the day you plan to serve it to maintain freshness.
Conclusion
Cherries in the Snow is more than just a dessert; it’s a sweet experience that captures winter’s joy with festive flair. With these easy steps and creative adaptations, you can create a dish that is not only delightful but also accommodating to dietary preferences. So why not give it a try? Share your version of this winter treat and let us know how it turned out!
Frequently Asked Questions
What can I use instead of cherry pie filling?
You can use homemade cherry filling, or substitute with other fruit fillings like blueberry or raspberry based on your preference.
Can I prepare this dish in advance?
Absolutely! Just prepare the layers separately and assemble them on the day you intend to serve them for optimal freshness.
Is there a gluten-free option?
Yes! Substitute with gluten-free angel food cake, available at many grocery stores.
By following this guide, you can ensure your Cherries in the Snow becomes a hit at any gathering. Happy cooking!
Print
Cherries in the Snow
- Prep Time: 20 minutes
- Cook Time: 0 minutes
- Total Time: 90 minutes
- Yield: 12 servings 1x
- Category: Dessert
- Method: Chilling
- Cuisine: American
- Diet: Vegetarian
Description
A delightful winter dessert that combines cream cheese and cherry pie filling for a sweet treat that’s easy to make.
Ingredients
- 12 ounces block style cream cheese (room temperature)
- ¾ cup powdered sugar (sifted)
- ⅓ cup whole milk
- ½ teaspoon vanilla extract
- 8 ounces frozen whipped topping (thawed)
- 1 pre-baked angel food cake (torn into ¾–1 inch pieces)
- 42 ounces (2 – 21 ounce) cans cherry pie filling
Instructions
- Beat the cream cheese in a large bowl at medium-high speed for 1-2 minutes until light and fluffy.
- Mix in the sifted powdered sugar and continue beating until fully incorporated.
- Pour in the whole milk and vanilla extract; keep beating until the mixture is smooth and fluffy.
- Gently fold the thawed whipped topping into the cream cheese mixture until no white streak remains.
- Carefully fold in the torn pieces of angel food cake without making it mushy.
- Transfer the mixture into a 9×13 baking dish and spread it into an even layer.
- Spoon cherry pie filling evenly over the top.
- Refrigerate for a minimum of 30 minutes, or up to 2 hours.
Notes
Store leftovers in an airtight container in the refrigerator for up to 3 days. Consider using low-fat cream cheese or reduced sugar cherry filling for healthier options.
Nutrition
- Serving Size: 1 serving
- Calories: 250
- Sugar: 20g
- Sodium: 250mg
- Fat: 12g
- Saturated Fat: 6g
- Unsaturated Fat: 0g
- Trans Fat: 0g
- Carbohydrates: 35g
- Fiber: 1g
- Protein: 3g
- Cholesterol: 30mg
Keywords: dessert, winter dessert, cherries, easy dessert, cream cheese dessert
