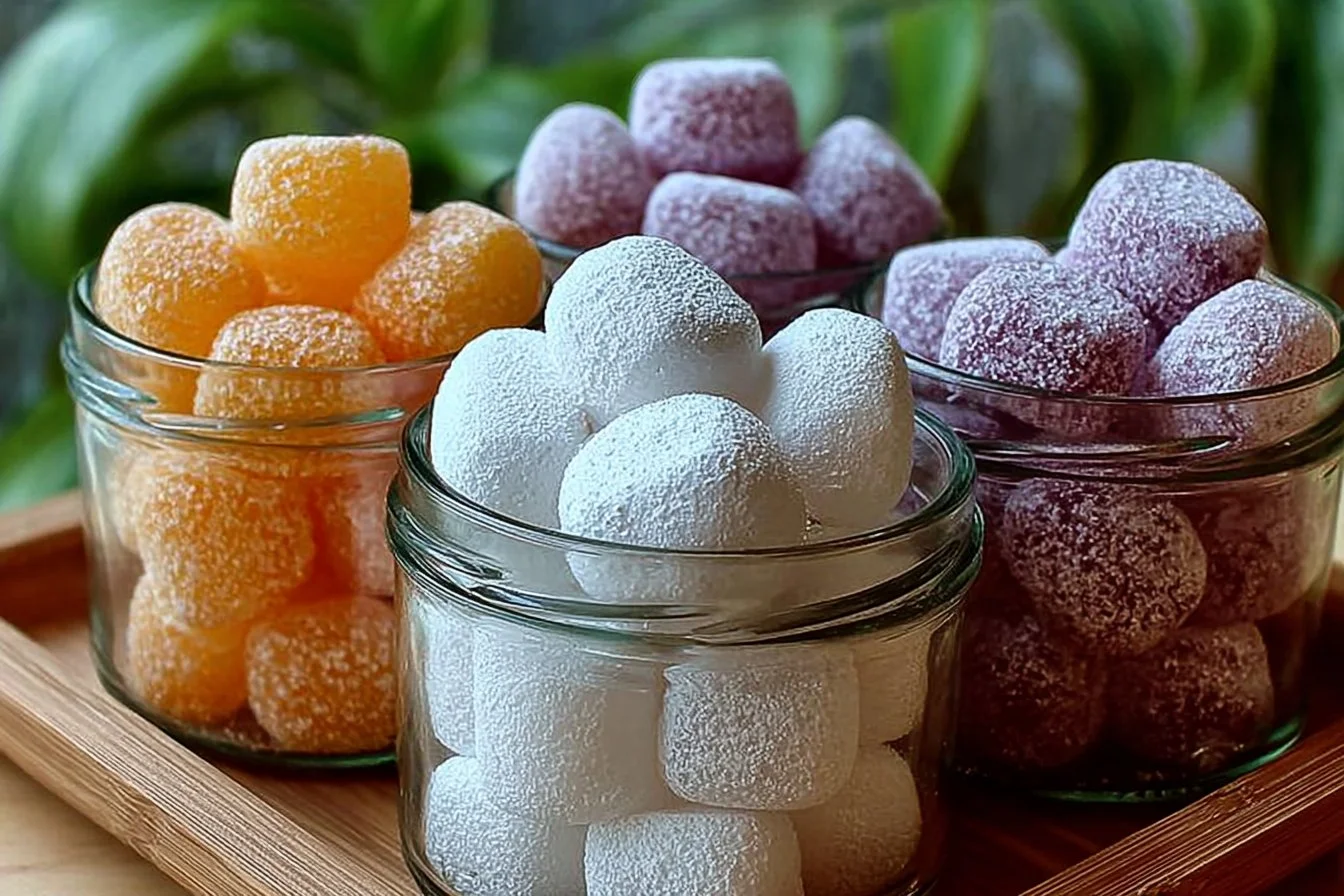
Have you ever wondered how you can fill your home with soothing aromas without relying on commercial air fresheners? The answer lies in DIY Aroma Stones! These delightful creations not only add a personal touch to your home decor but also allow you to enjoy the benefits of your favorite essential oils. In this blog post, we’ll dive deep into the world of DIY Aroma Stones—exploring how easy it is to make them and why they might be the perfect solution for your fragrance needs.
Ingredients Needed
To create your own DIY Aroma Stones, you’ll need the following ingredients:
- 2 Cups Baking Soda: This versatile ingredient serves as the primary binding agent, providing the stones with structure.
- 1 Cup Cornstarch: Cornstarch adds a smooth texture to the mixture, enabling you to mold it easily into shapes.
- 1 1/4 Cups Water: Essential for hydrating the mixture and achieving the perfect dough-like consistency.
When crafting your stones, consider these substitutions: You can add a few drops of food coloring to create visually appealing stones. If you want to enhance the natural scent, consider incorporating dried herbs or spices into the mixture before shaping.
Timing
How long does it take to immerse yourself in the wonderful world of scents? The total preparation time for DIY Aroma Stones is approximately 90 minutes, which is 20% less time than many traditional crafts. This includes about 10 minutes for mixing and shaping, plus a drying time of over 8 hours (preferably overnight), allowing ample time for moisture to escape.
How to Make DIY Aroma Stones
Step 1: Prepare Your Mixture
In a large bowl, combine 2 cups of baking soda and 1 cup of cornstarch. These ingredients work together to form a delightful base for your stones.
Step 2: Add Water Gradually
Now, gradually add 1 1/4 cups of water while mixing. This step is crucial as it ensures that you achieve a consistent, dough-like texture. If the mixture is too dry, add a little more water.
Step 3: Shape Into Stones
Once your mixture has the right consistency, shape it into small stones or whatever forms you desire. You can create different sizes for varied uses throughout your home.
Step 4: Drying Time
Let your stones dry completely, preferably overnight. Placing them in a well-ventilated area can speed up the drying process. Remember that fully dried aroma stones will hold their shape better!
Step 5: Add Essential Oils
Once the stones are dry, it’s time for the fun part! Add a few drops of your favorite essential oils to each stone. Enjoy the aromatic benefits and allow your home to be enveloped in pleasant scents like lavender, eucalyptus, or lemon.
Nutritional Information
While DIY Aroma Stones are not food items, it might interest you to know that using natural ingredients like baking soda and cornstarch offers a non-toxic alternative to many store-bought air fresheners that may contain harmful chemicals. Opting for essential oils can enhance your well-being as many oils provide therapeutic benefits.
Healthier Alternatives For DIY Aroma Stones
You can modify the recipe to include eco-friendly or organic ingredients. Instead of regular baking soda, consider using aluminum-free baking soda. Ditch the cornstarch for arrowroot powder if you’re looking for a gluten-free option. Mixing in natural dyes from beets or turmeric can provide lovely hues without artificial colors.
Serving Suggestions
Display your DIY Aroma Stones in stylish bowls around your home. For a beautiful centerpiece, arrange them in a shallow tray alongside fresh flowers or candles. You can also place them in areas like closets, bathrooms, or gift them to friends!
Common Mistakes To Avoid
- Ignoring Drying Time: Rushing the drying phase can lead to stones that crumble easily. Always allow them to dry thoroughly.
- Using Excessive Water: Too much water can create a sticky mess and weaken the structure. Add water slowly!
- Skipping Essential Oils: Adding oils after the stones have dried can limit their efficacy. Make sure to apply the oils while the stones are still adaptable.
Storing Tips For DIY Aroma Stones
Store your finished DIY Aroma Stones in a cool, dry location. Keep them in an airtight container to prevent them from absorbing moisture from the air. To refresh their scent, simply add a few more drops of essential oils as needed.
Conclusion
In summary, DIY Aroma Stones are a fun, simple, and eco-friendly way to infuse your living spaces with refreshing scents. Not only are they easy to make, but they also offer a custom touch to your home that store-bought air fresheners simply can’t match. Try making your own DIY Aroma Stones today and transform your home into a fragrant paradise!
Feel free to share your creations or explore more DIY projects on our blog—let’s keep the aromatic journey going!
Frequently Asked Questions
What essential oils are best for DIY Aroma Stones?
Some excellent options include lavender for relaxation, lemon for freshness, and eucalyptus for an invigorating scent.
Can I customize the shapes of my aroma stones?
Absolutely! Feel free to use molds in various shapes or cookie cutters to craft unique designs.
How long do the scents last?
The duration of the aroma depends on the essential oil used, but typically, the scent can last anywhere from days to weeks.
Are DIY Aroma Stones safe for pets?
Generally, they are considered safe; however, always ensure that the essential oils you use are non-toxic to your pets.
How do I refresh the scent on my stones?
Simply add a few drops of your favorite essential oil to the stones whenever you notice the scent fading.
Embrace your creativity and enjoy making your DIY Aroma Stones today!
PrintDIY Aroma Stones
- Prep Time: 10 minutes
- Cook Time: 480 minutes
- Total Time: 490 minutes
- Yield: Varies based on stone size
- Category: Crafts
- Method: Crafting
- Cuisine: N/A
- Diet: N/A
Description
Create your own relaxing scents at home with DIY Aroma Stones using simple ingredients.
Ingredients
- 2 Cups Baking Soda
- 1 Cup Cornstarch
- 1 1/4 Cups Water
Instructions
- In a large bowl, combine 2 cups of baking soda and 1 cup of cornstarch.
- Gradually add 1 1/4 cups of water while mixing until you achieve a dough-like consistency.
- Shape the mixture into small stones of your desired size.
- Let the stones dry completely, preferably overnight, in a well-ventilated area.
- Add a few drops of your favorite essential oils to each stone.
Notes
Store finished aroma stones in a cool, dry location. Refresh scent by adding essential oils as needed. Avoid rushing the drying time and using excessive water.
Nutrition
- Serving Size: N/A
- Calories: 0
- Sugar: 0g
- Sodium: 0mg
- Fat: 0g
- Saturated Fat: 0g
- Unsaturated Fat: 0g
- Trans Fat: 0g
- Carbohydrates: 0g
- Fiber: 0g
- Protein: 0g
- Cholesterol: 0mg
Keywords: DIY, aroma stones, essential oils, home fragrance, crafts

